Rāda ziņas ar etiķeti DIY. Rādīt visas ziņas

5.29.2014

DIY cute beauty stuff holder


Hello. Today I decided to share with DIY post. But I've one problem. I don't know how to call that thing I just made. So let it be, let it be.. Cute beauty stuff holder! It was so easy to make, even though it don't look as perfect as I imagined before I started to work. But overall I think it looks really cute and finally there won't be that plastic & cheap looking thing on my working table. So this is my idea of cool looking beauty stuff holder: 


So this is that ugly beauty stuff holder about which I was talking about. And then I had idea that I could do some makeover to make it look like something I would love to see on my desk. 


--> I used: Hot glue gun, glue sticks, plastic cup, cotton rope and paper knife, also
beauty magazine on which I cut rope and held the hot glue gun. I used magazine because I didn't wanted to damage my working table. 


Step 1 --> Squeeze hot glue on plastic cup on the bottom and put a rope on. Keep going -> first hot glue, then put a rope on glue and remember to force rope a little bit. 


Step 2 --> Repeat first step until your almost done.


Step 3 --> When you're almost done, ehem, don't stop! Wrap rope around plastic cup top and glue the end of rope, so it won't gonna come undone (You can never know what will happen with your beauty stuff holder, so work hard) 


Step 4 --> Finally! The bottom of plastic bottle. Start to wrap rope around your plastic bottle. Make it look like circle. 


And this is how it should look. 


And this is how it looks right now! Such a cute beauty stuff holder, right? :)
I'm sorry if you didn't understand something, I've to say that making these DIY posts isn't as easy as it seems. I can't find so many words to describe the process. If you need some help comment below and I will help you!

Kisses.

9.28.2013

D.I.Y - from buttons to earrings

Hello everyone. How's going? I'm sick. My throat hurts so badly, I have a runny nose and my ears hurts a bit. Last night I went to see my girl Sintija, we had some tea and walked around. It was raining and it was pretty cold too. When I got home I felt strange, but I thought that it's just my imaginary. This morning I woke up and I was feeling just terrible. So all day I drank some herbal tea with honey, lemon and ginger. I wish that I will feel better tomorrow, because I have to study and get ready for school.

I'm ready to share with new D.I.Y post! This time I decided to make new earrings. I had some buttons for so long time, I don't remember where did I got them, but I knew that I can't throw out them, because I really liked them. So yeah, enjoy this post and I wish that you will get inspired and make your own earrings or another accessories!

This is what you need to make earrings - 2 buttons, tongs, glue & earring stand and fasteners. As you can see, I didn't have suitable stands and fasteners, so I took gold ones. Yep, maybe not the best choice, but nobody will see your earring back! So whatever - use products that are available for you! 

First step - cut buttons back off! 

That's how my buttons looked after cutting off they backs.

Then I just squeezed a small drop of glue and added earring stands. (My first idea was to put earring stands in the middle of button back, but as it was too rugged I decided to put them a little bit higher.) Remember to wait a bit till glue is dry.

And that's it! That's how my earrings look - I love them. Happy with result? Totally! I will wear them often, because they're not to big and they're not heavily too. I wanted earrings like this for so long and now I have them! What do you think? 

(Last picture is not good at all, I'm sorry. It was to dark in room already, but I had to make that picture quick. As I'm sick, I didn't use any cosmetics. All pictures are taken with my iPhone 5.) 
x

9.22.2013

D.I.Y chain necklase

Hi! How's life?
Today I want to share with infrequent post in my blog - D.I.Y post. I decided to make this post because I found gold chain in my drawer. It's pretty old (it was my dad chain, if I know right) and it was way to long, so I didn't use it - I was looking like rapper when it hung on my neck. Ridiculous! So I decided to transform it to slightly feminine necklace, but after all it looks like grunge gold chain. I love how it looks and I will wear it. And the best thing - it was so easy to make it:

Here is my gold chain - the first thing you have to do - measure the lenght of your chain and split it into phases. (I didn't use measuring tape, I just imagined how it needs to look and started to work, so I don't know parameters. I'm sorry, but that's the way I work!)

Next step - open one, little part of chain and place another part of chain, then close that part of chain which you opened. 

Do this step one more time considering the distance, so you necklase will look symmetrical. Here's my outcome. 

As my necklase was little bit too short and I even couldn't wear it, I decided to add some speacial clossure and one little chain. This was the easier part of making my necklace. 

Here's result. I LOVE IT! It's both simple and gorgeous :)
What do you think of D.I.Y posts? Share with me.
Keep smiling.

7.10.2012

My first DIY

Yesterday was sooo sunny and hot! But then started heavy rain , lightning and thunder .. That was a little bit scary . By the way in that moment I had nothing to do and then I got some idea - from my jean jacket make a vest! So today I started this DIY :-) 

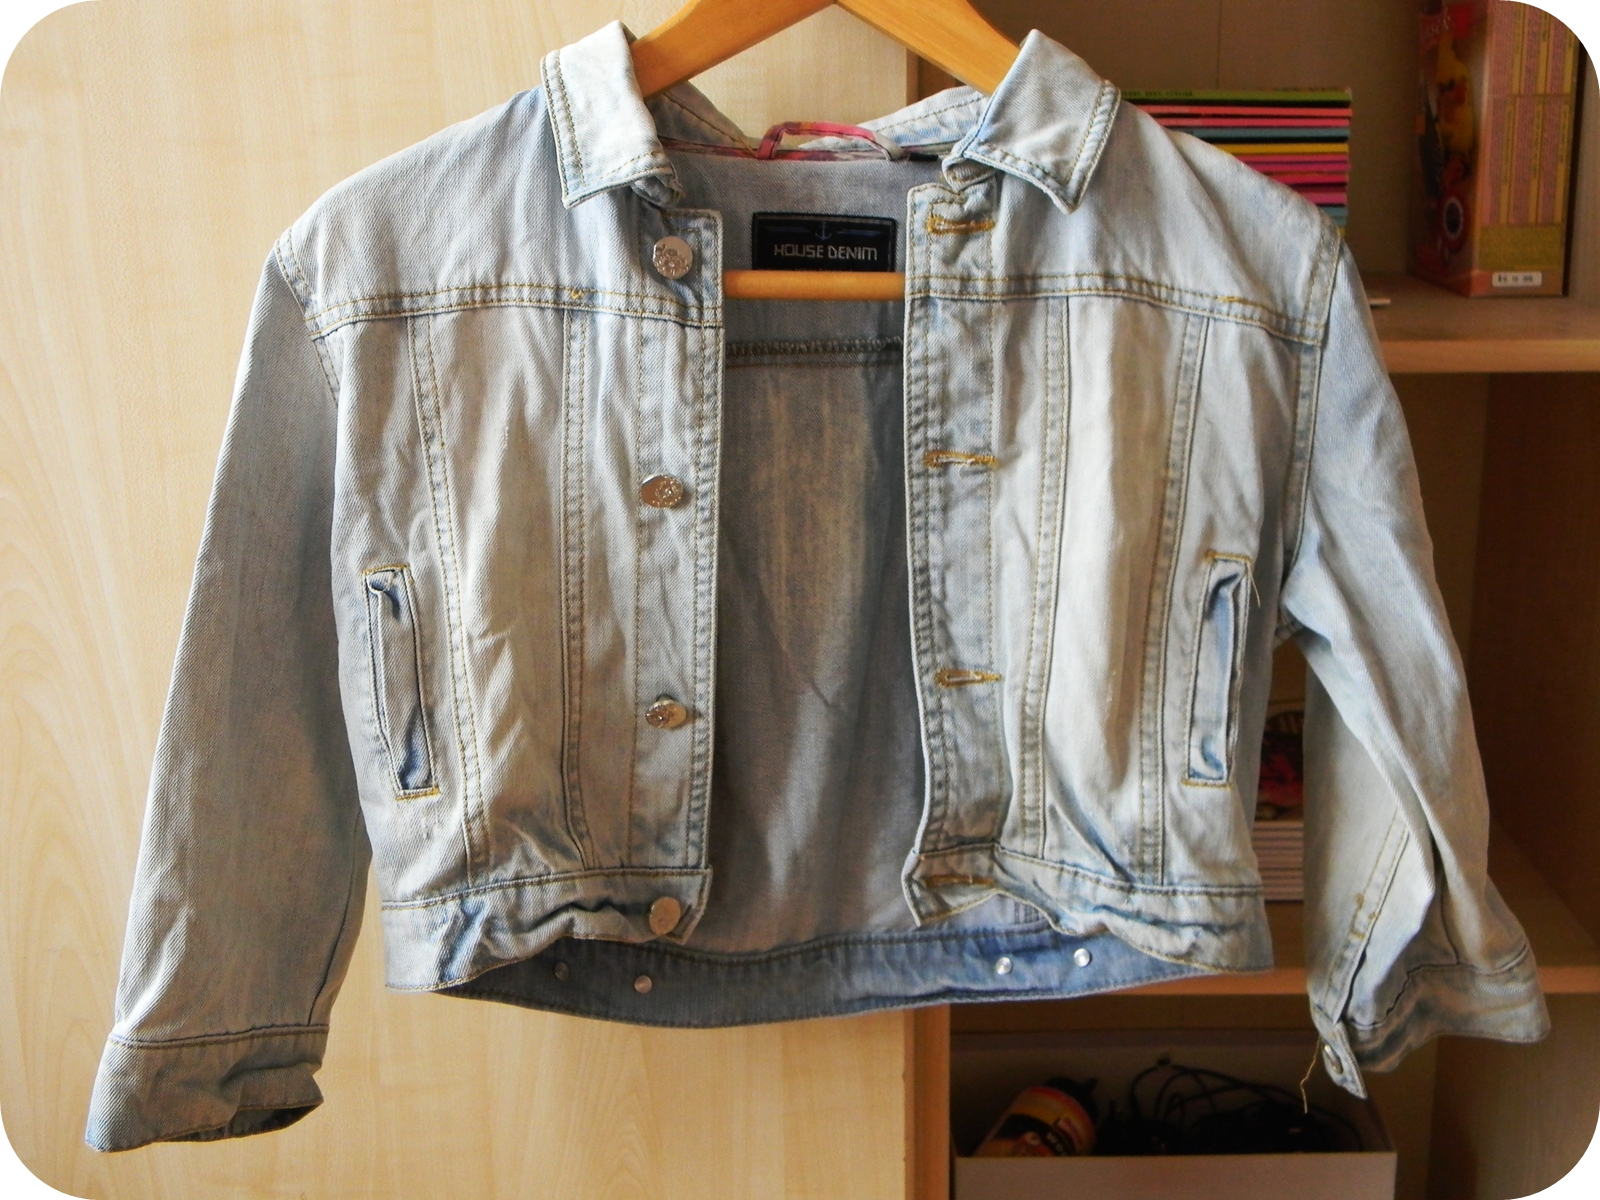
That's how looked my jean jacket . I bought it in House clothes shop and I wore it just in last spring & summer . So since I don't use it - it's useless . 

That's how it looked on me.. It's M size and jackets hand's was a little bit big for me . And I'm sorry for my disorder on the table.. That's how I work , haha! 

What I did ? I just cut jean jacket hand's off 

And here it is - my new jean vest :-)
That's all! Maybe later I will add some studs or spikes to pockets , but only if I will find good looking spikes / studs . 


Some photos from yesterday , after rain :-)
xo